My last road trip caught me off guard – and surprisingly unprepared – when a tire blew en route to Las Vegas. While emergency situations like this aren’t uncommon, they can be a punch in the gut to the person who thought they planned for every eventuality. For women, especially when traveling solo, taking a little extra time to prepare yourself for scenarios such as these can not only empower you to do hard things in the future but can also greatly increase your chances of tackling a tough situation on your own while prioritizing your personal safety.
To reap the benefits of being prepared, start with a road trip checklist: it will give you a great visual of what you need and why, so you can have peace of mind as you pack and throughout your journey. Covering these basics won’t take much of your time, and it will save you stress and aggravation while enabling you to protect yourself and your belongings from the unscrupulous and the unknown.
Basic road trip tips include quick checks like filling up your tires, checking fluids in your vehicle like washer fluid, engine coolant, and oil, adding a first aid kit and an emergency supplies survival kit to your trunk, and letting basic automotive tools and safety equipment tag along for any emergency fixes.
Step 1. Time for a Check-Up: Car Prep and Maintenance
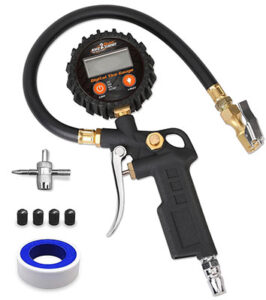
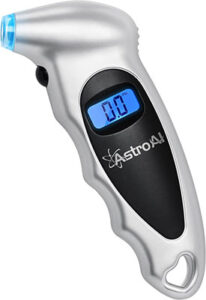
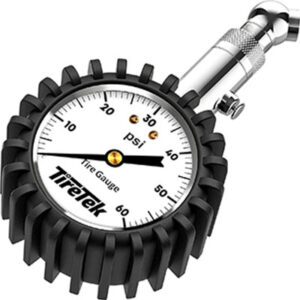
Go over the outside of your vehicle first by checking tire pressure and airing up to the ideal amount. If you don’t have a pump rattling around in your garage, just go to the closest gas station. You may save yourself money and a major headache if you discover a slow leak or a nail embedded in your rubber before you hit the road.
Next, open the hood and top up your fluids. Add washer fluid and coolant, and if you’re caught up on your oil change, use the gauge to see if you need to add a bit of fresh oil. If you’re a DIY-er and want to attempt an at-home oil change, this is a simple process with the right tools and supplies. Otherwise, schedule a quick change at your local repair shop or dealership for peace of mind and a smooth ride for you and your machine.
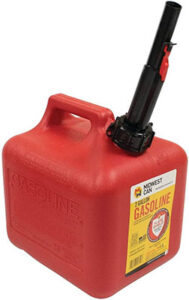
Midwest Can 2310 Quick-Flow Gas Can – 2 Gallon
If you’re traveling long distances or you anticipate being far from gas stations or towns, you can also consider bringing small containers of extra fluids to top up dwindling supplies. If your vehicle’s gas mileage isn’t awesome, a canister of gasoline will afford you peace of mind if you’re skittish about an empty tank.
Step 2. Prep for First Aid on the Go
Typical items to include in your kit are a variety of adhesive bandages in different sizes, antibiotic ointment, cortisone cream, rubbing alcohol wipes, cotton swabs, sterile gauze pads, sticky first aid tape, and tweezers. You may also consider adding painkillers like Tylenol or Advil for headaches, back pain, or eye strain, an antihistamine for allergies, antacids for tummy trouble, and any prescription drugs you take normally.

Typical items to include in your kit are a variety of adhesive bandages in different sizes, antibiotic ointment, cortisone cream, rubbing alcohol wipes, cotton swabs, sterile gauze pads, sticky first aid tape, and tweezers. You may also consider adding painkillers like Tylenol or Advil for headaches, back pain, or eye strain, an antihistamine for allergies, antacids for tummy trouble, and any prescription drugs you take normally.
Step 3. Line Up Navigational Support Both On and Offline
Your sense of direction may be excellent, but you still need to map out your route and have a flexible attitude when navigating. You may come across construction, unexpected road closures, accidents involving other vehicles, or unanticipated local events that clog up your smooth sailing. Potentially the most important part of this step is taking your navigation both on and offline.
Relying on technology like Google Maps is a no-brainer, but make yourself bulletproof by downloading the offline version, too, as well as arming yourself with a paper map (or two) to make sure you can orient yourself anytime, anywhere. If you anticipate hiking in the wilderness during your journey, you might feel even safer with an emergency GPS device–in a true emergency, if you can’t get a signal on your cell phone, this will get help to you as quickly as possible.
Step 4. Survive a Snack Attack
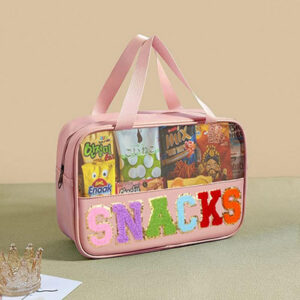
Okay, this isn’t actually for situations when you’re just “hangry.” Having extra food and water for emergencies is key for a road trip. If you’re traveling during hotter months, your chances of getting dehydrated multiply, and if you’re in a real emergency and need clean water, it will be there waiting. Getting stuck in other types of inclement weather means you’ll need supplies tostay nourished, too. The best option is to grab 1–2-gallon jugs and keep them handy for this.
Shelf-stable snacks are another necessity. These are easy to store and don’t take up much space. Whether you need instant energy or know you will not be able to get any supplies while you’re stranded, keep small containers of nuts, dried fruit, energy bars, crackers, and beef jerky available.
Step 5. Junk in The Trunk: Tools You Actually Need
If the thought of using tools on your vehicle in a pinch makes you nervous, order a basic roadside assistance kit and familiarize yourself with its contents. Finding yourself and possibly other people stranded with a dead battery or trying to tinker on the engine in the middle of the night (possibly in a rainstorm) is so much worse without the right tools and gear. A proper emergency roadside assistance kit usually contains items like jumper cables, duct tape, a waterproof flashlight, extra batteries, cable ties, a screwdriver, a poncho, and if it’s from a well-known company like AAA, contact information and accident guidelines.
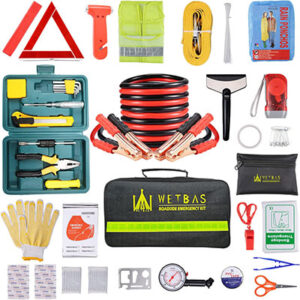
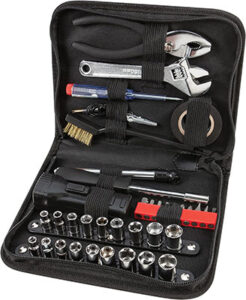
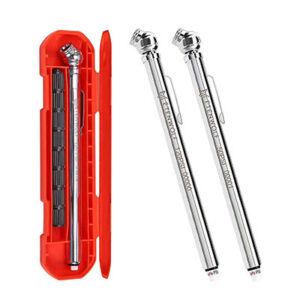
Other tools seasoned road trippers swear by for emergency roadside scenarios are a pencil gauge for checking the air pressure in your tires, a jump starter if you’re worried about breaking down without another vehicle coming along in time, flat tire sealant, a small car fire extinguisher, a car jack, and a spare tire. If you haven’t changed out a tire yet in your lifetime, shop around online for a jack you feel comfortable with, and do a mini-YouTube dive on some DIY tire change videos to get an idea of the process in case you experience a blowout. Consider a compact toolkit with a few extra items like a wrench and pliers that will make your life easier if you have to make any under-the-hood adjustments.
Step 6. Craft a Comfort-Focused Makeover for Your Car’s Interior
There are plenty of ways to make the interior of your travel vehicle more comfortable and road-ready while you drive (or relax while someone else does.)
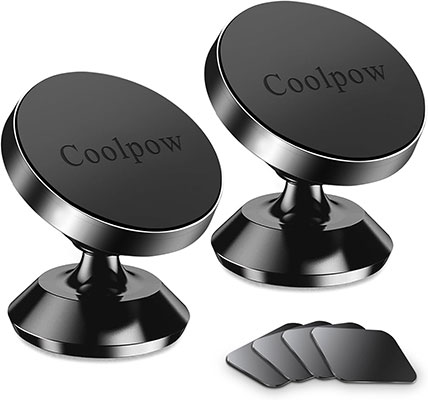
Let’s talk about your tech first: for cell phone communication and navigation on the road, don’t leave your device to slide around on the seat or fall on the floor. Invest in a magnetic dashboard mount that will secure your device and leave it handy for you to access directions or take and make calls. Don’t forget the power cords and chargers, either, and be sure to test out the cords and charging blocks before you leave so you’re not lugging around non-functioning paraphernalia.
Seat covers, wheel covers, and durable floor mats are other types of accessories that can protect the inside of your car from dirt, mud, debris, and spills while also enhancing comfort as you travel. Shoes can safely come off for kiddos in the back, while the soft covers will prevent the seats from scorching skin if the car has to be left in the sun. You’ll have easy cleanup when you come home and can simply remove the covers and throw them in the washing machine. Then, take out the floor mats and give them a good shake and scrub before either stowing them for the next time or putting them right back into your vehicle.
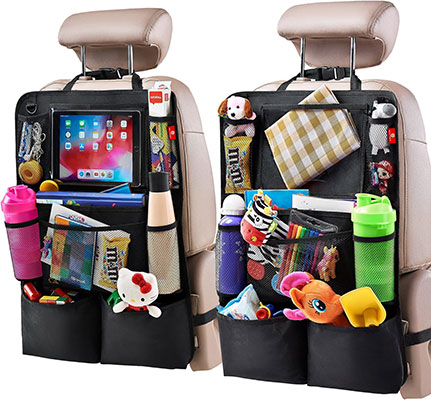
If you have passengers who like to bring everything but the kitchen sink, try using car seat organizers that hang over the back of the driver and passenger side seats. These are multifunctional and have plenty of pockets to store books, small games, stuffed animals, devices, drinks and snacks, and accessories like sunglasses and hats. You won’t need to worry about constantly handing things back and forth to your tiny travelers, and they can take ownership of their belongings while gaining experience keeping track of what they need throughout the trip! As a bonus, the organizer protects the back of your seat from little legs that accidentally kick and scuff the fabric.
Step 7. Gather Protective Paperwork
Your glove box may be neat as a pin, or it could be a veritable treasure trove of old receipts, expired coupons, empty chip bags, and other inexplicable items. Take five minutes to get rid of anything that’s trash, and make sure the rest of your legal documents are accessible and available should you need them. Insurance cards, vehicle registration, the user manual, roadside assistance contact information, paper maps, and your most recent service documents.
If there’s still room, feel free to stash a couple of plastic bags for trash, an energy bar, a couple of pens, and a small pad of paper so they’re out of the way but there if you need them.
Road Trip Preparation Checklist
Now it’s time to craft your checklist. A basic one is provided below, but you know your own needs best and what you may need to add or omit.
Use this as a starting point to get your car’s interior ship-shape, your exterior road-ready, and your emergency scenarios accounted for:
- First Aid Kit
- Emergency Roadside Assistance Kit
- Basic Tools and Equipment
- Emergency Food and Water
- Check/Top Off Tires and Fluids
- Check/Fill Tires
- Add Seat Covers and Floor Mats
- Plug in Cords and Charging Blocks
- Affix Phone Holder or Magnet
- Sort and Stash Important Papers in the Glove Box
It may seem like a lot of work upfront, but trust us: using this list will get you in the habit of always preparing for the worst so you can relax and enjoy your road trip. You’ll have what you need in case of an emergency, the confidence to tackle the problems you can, and the peace of mind of knowing who to call if you can’t. When you tackle the list, use your common sense and consider the season, the duration, the destination, and the company while you get ready; anticipating both needs and wants makes for a memorable and joyful journey.

Need More Tips? Follow the Red Mountain Blog
Now that you’re prepared for the worst, you’ll be all set to have the best time. Should any of the scenarios we mentioned befall you, you’ll feel ready to rise to the occasion. For more car owner tips and tricks, as well as history, games, and tons of fun for car enthusiasts of every persuasion, follow the Red Mountain blog.
Jenny has a passion for learning and sharing what she learns. She has researched, written and published hundreds of articles on a wide variety of topics, including: SEO, design, marketing, ethics, business management, sustainability, inclusion, behavioral health, wellness, autos and work-life balance.