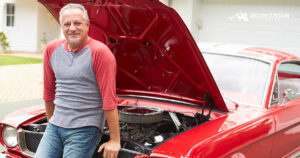
Love your car? There are many ways to continue improving upon the overall look and capabilities of your vehicle. Additionally, there are countless more ways to customize it to your preferences. Since the invention of window tint in 1966, tinted windows have provided a popular upgrade choice to drivers of all persuasions.
Benefits of Tinting
We all know that having a car with tinted windows is cool, but window tint can also provide many health benefits.
Skin and Eye Protection
For example, with the decreasing ability of the atmosphere to shield us from ultraviolet rays, protection from the sun is crucial. It’s important to your well-being to protect your skin year-round. While there are several ways to protect yourself from the sun, window tinting is the most comprehensive. Just as sunglasses are necessary to protect your eyes from sun damage, window tinting provides a shield and a relief from the sun’s rays while driving that will keep you both healthy and alert.
Theft Protection and Privacy
Tinted windows can also keep people from looking inside your car, providing you more privacy while parked and while driving. Additionally, tinting can prevent would-be thieves from seeing the contents of your car, decreasing the likelihood of theft.
Vehicle Protection
With tinting to provide shade to the windows, the interior of the car will fade slower, protecting your seats and dash from premature wear. Because the tinting actually filters out the sun’s rays, the interior will also stay cooler, meaning the air conditioning will run less.
Comfort
The interior of your car remaining cooler also means you’ll stay a lot more comfortable while driving or riding in your car. Especially for those models that don’t have sufficient cool air circulation to the back seat area, window tint can help keep the interior of your car a great deal cooler.
Visibility
Window tinting improves a driver’s ability to see the road by shielding the eyes from the sun’s glare. This enables you to more easily avoid potential hazards
DIY Tinting Can Save You Money
Tinting your car windows can be expensive if you choose a dealership. The cost can range from a couple hundred dollars to thousands for a super-custom job. Now, with new tinting products, you can do it yourself. Learning how to put window tint on a car or truck is easy—but first, you’ll need to purchase your tinted film.
There are multiple colors and types of tinted window material available. Picking the right tinting material is very important, and you’ll need to begin by deciding exactly what you want the tinted film to accomplish. Consider these popular tint types.
Carbon Tints
This new technology is not only non-metal, but also fade resistant. The film is injected with carbon fibers, allowing the tint to keep the cabin temperature cool while shielding passengers from the glare of the sun. This film is known to last a long time.
Ceramic Tints
Long considered the top tint material, ceramic tinting is one of the best performing tinting applications. The small ceramic particles block solar heat, keeping your vehicle cooler and adding value to your vehicle.
Dyed Tints
With dyed tint, the darkness and color options of the film are limitless. This tint is highly recommended for darkening the view of the cabin, allowing for greater privacy. This is one of the more affordable options and is easily available.
Hybrid Tint
This film contains half dyed film and half metalized tint. As such, this film provides the advantages of both tint types. The film dye will filter light while the metallic particles block the sun rays, giving the film a crisp, dark look that will protect you from UV exposure. This tint is non-reflective.
Metalized Tints
As you might expect, metalized tint contains metal particles to block the sun. Aluminum or titanium are used to give a shimmer to the film. You can choose from deposition technology or sputter process film tinting. This tinting is recommended for hot climates and resists fading.
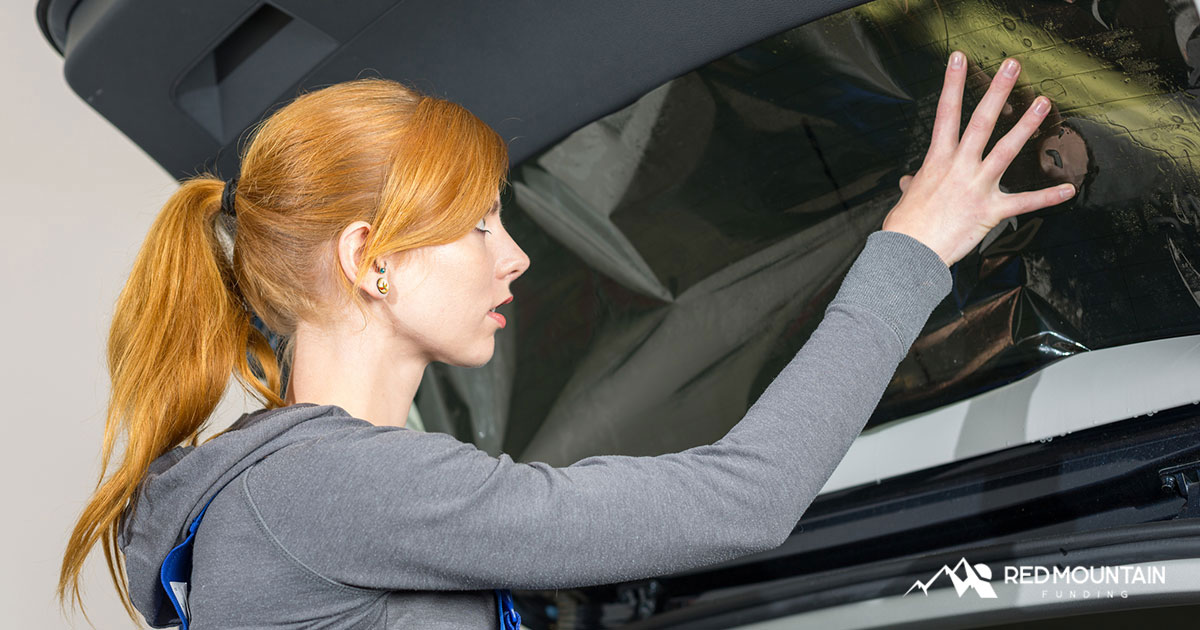
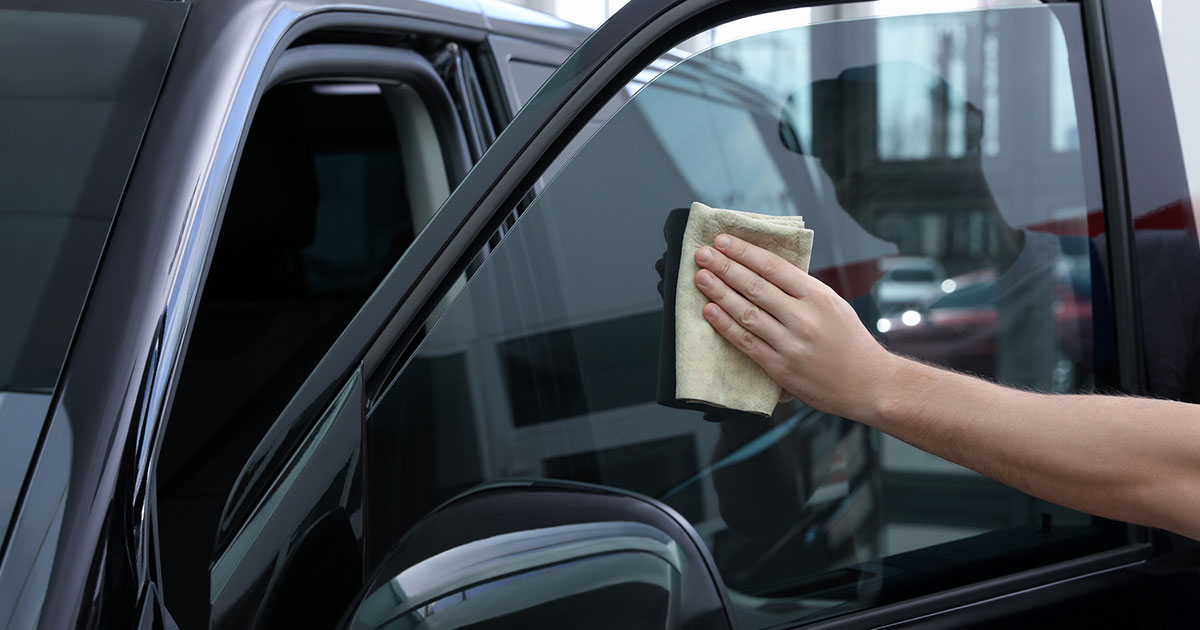
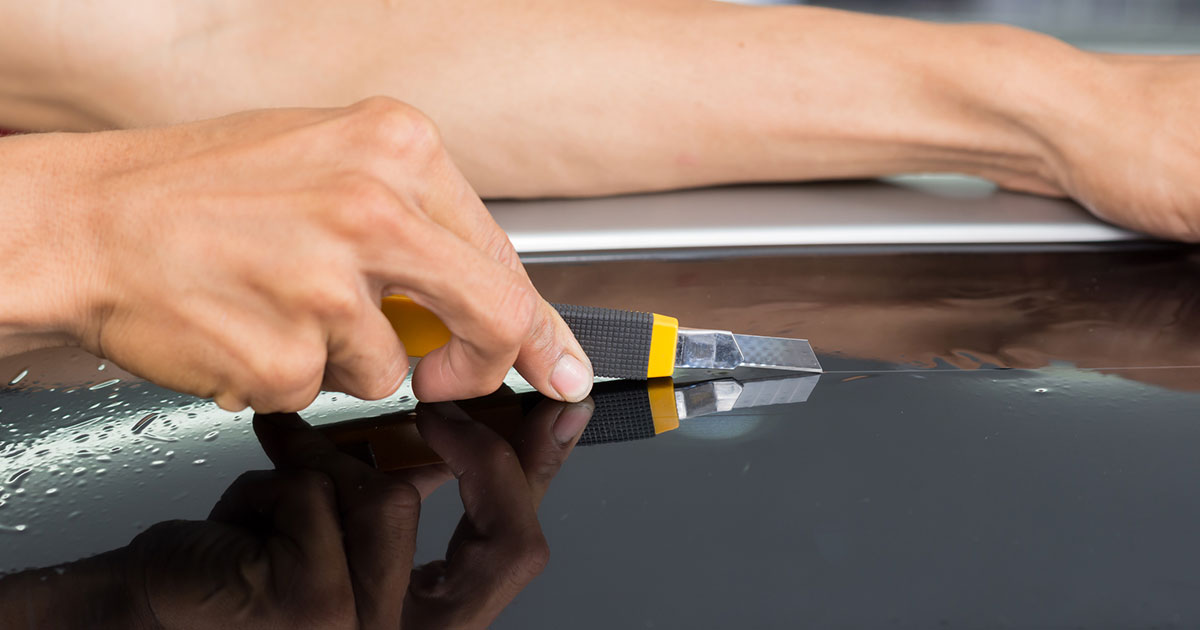
How to Put on Car Window Tint at Home: Prep
Once you’ve purchased your tinting material, you’ll need to apply the film. The most popular tinting solutions come on a roll of window tint, but custom, pre-cut tinting kits are now available for most vehicles. If you’ve chosen a roll, you’ll need to ensure your tint fits your windows. Rest the unrolled tint against the exterior of each window and cut roughly to fit, leaving 2 to 3 inches of overlap.
Some people think the tint belongs on the outside of the window, but it doesn’t. If you were to install the tint film on the outside, the film would come off in wet weather and could chip by flying debris. Prepping the window of the car is a very important step. Dust and lint can cling to glass and get stuck under the tint film.
To save time, you will need the following items:
- Application solutions;
- Lint-free dusting cloth
- A razorblade
- A scraper
- Water removal squeegee
- Heat gun or steamer
- Adhesive spray
This process of tinting windows can take up to two hours or more, depending on how many windows are being covered. Because laws regulating tinted windows vary by state, make sure to research and consult local laws before tinting your car windows.
Then, you’ll need to prep your vehicle and windows:
- Prepare by removing all accessories and cleaning as you go.
- Keep the window clean< before the tint is applied.
- Remove all obstructions inside and outside of the car that might impede your working space.
- Spray the application solution on the inside of the car window.
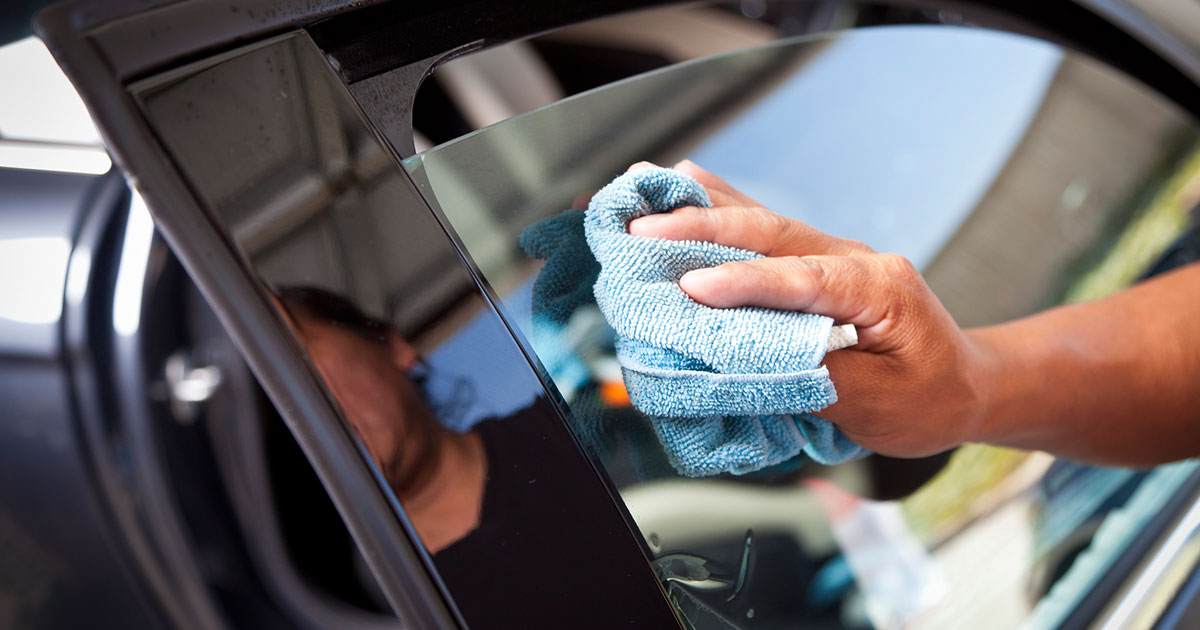
- Using the sharp blade, slide the razor blade across the window, removing the dirt and lint on the window.
- Do not mark the glass with the blade.
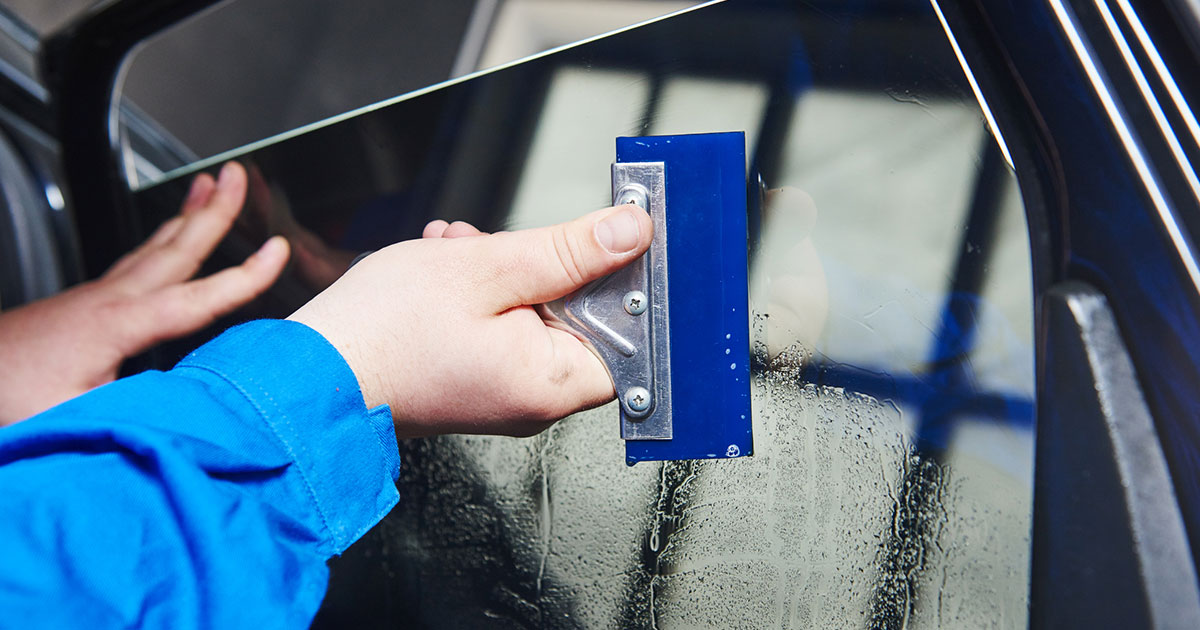
- Use the removal squeegee, running it across the window from side to side to remove anything that has been left by the blade.
- Clean the window again if necessary.
- Wipe down the trim of the window to get rid of dust particles. Apply the solution to the inside of the window. Do not overspray.
How to Put Window Tint on a Car Window: Careful Application
Next, you’ll begin applying the tint:
- With the film layer facing toward you, roll the tinted film across the window. The solution applied to the window will help keep the film in place.
- Squeegee the window, if necessary, to keep the tint sheet from moving.
- Remove the tint film and spray an adhesive, such as 3M Super 77.
- Attach a corner of the film to the window, with the covered adhesive facing the window.
- Slowly pull the adhesive protector from the back of the film.
- Spray the window with the adhesive as you peel back the protective layer of film.
- Once the film is applied, use the window squeegee to push out the air bubbles.
- If the air pockets are still present, wrap the squeegee with the lint-free cloth and continue to work on the bubbles. The cloth can be used for wiping up the extra solution on the door and panel.
- Lastly, use the heat gun to work out the stubborn air pockets. This process is not always necessary.
Cleaning the Tinted Window
Now that the tinted film has been installed, the tinted windows will need special care to keep them well maintained. Since the tint is on a film instead of within the window glass itself, it’s important to clean them carefully. When cleaning your windows:
Do
- Park in a shaded area
- Clean the whole car
- Use a soft cloth
- Use water from a spray bottle
- Use an ammonia-free solution, and use sparingly
- Wipe the window in the same pattern either up and down or side to side, but not a combination of both
- Use sudsy sponges for stuck-on dirt
- Use homemade cleaners, made with rubbing alcohol, water, and baby soap
Don’t
- Use rough or metal scrubbers
- Use any cleaner containing ammonia before or after installation
- Use any sharp object that will tear the film
- Overclean
- Clean the film until at least 24 hours after installation
How Can You Remove Window Tint?
Now that you know how to put on car window tint, what do you do if the tinting needs to be removed? Perhaps you are unhappy with the tint, or your older tinting has begun to peel or bubble and needs removed. Maybe you love the tinted look but simply want it to be darker.
No matter the reason for removing the tint, you can tackle this DIY project as well and save money.
Have these items on hand before you start:
- Cordless or corded heat gun, hairdryer, or steamer (have extra water on hand if you are using the steamer, to refill often)
- Dry rags (clean rags are preferable)
- Window cleaner
- Razorblade
If you are using corded equipment, make sure the extension cord has enough slack in it to move around the vehicle. When using the steamer, the water reservoir needs to be filled before the item is turned on to heat up. We suggest starting on a rear side window.
Then, follow these simple steps:
- Examine the edge of the window. Locate one of the corners of the border on the tinted film. You will start there.
- Make sure the door is open. Roll the window down about a ¼ inch to get to the edge of the film.
- Once the water in the steamer is heated to the right temperature, begin steaming the corner of the tint film on the top of the window.
- Use the steamer on both sides. The steamer should not be any closer to the window than 1/2 inch. Swing it from left to right, moving down the window.
- Use a razor blade to pull up a tab of the tinted film
- The film should begin to loosen on the corner or even peel up a little. If this doesn’t happen, steam the area again. Be careful, as the steam is hot.
- When the corner is up enough to pull, start peeling the film off slowly. Continue moving the steamer across the window to loosen the adhesive. This step is repeated down the window. Pull gently, so the tint film does not rip, and the glue comes off the glass.
- As you remove the film tint, go over the window with the steamer to make sure no glue is left.
- Wipe down the window with a dry cloth
- Nail polish can remove the small particles (this step might not be necessary)
- To finish, clean the windows with a glass cleaner.
- Repeat these steps with each window
Other Tools to Conside
It’s important to remember that films can vary in price, depending on the shade and type of film you want. Do your research before purchasing your tinted window film for your car. In addition to window tinting, consider storing other safety equipment in your car, such as a roadside safety kit. Most kits include road reflective triangles, jumper cables, a small flashlight, bandages, and a reflective vest.
One of the most important tools to have in your car is the emergency auto hammer and seatbelt cutter. This tool has points on the end to shatter the window in the event of an emergency. It also includes a seat belt cutter in case the belt doesn’t release following an accident. This tool needs to be within reach of both the driver and the passenger. Lastly, perhaps the most forgotten tool in a car, until we need it, is the jack. The jack is vital for changing the tire and is used to look under the car. The jack is usually kept in the trunk or under the spare tire in hatchbacks.
How to Put on Car Window Tint – DIY Made Easy
Doing a DIY project on your car can be a pleasurable and rewarding experience. If you’ve just tinted the windows of your beloved car, go ahead and give yourself a pat on the back for making your car stylish and safer in one project. Having a car with tinted windows is only one of the many health benefits that come from the window tinting you have on your car.
Jenny has a passion for learning and sharing what she learns. She has researched, written and published hundreds of articles on a wide variety of topics, including: SEO, design, marketing, ethics, business management, sustainability, inclusion, behavioral health, wellness, autos and work-life balance.